The quickest way to get your complete portfolio performance history and income forecast is to IMPORT a CSV (comma separated values) file from your online brokerage account.
You will need to download this file from your brokerage first and save it to your computer.
For a quick video tutorial on how to prepare your excel sheet for import, please check out our support page titled “Getting Your Excel Sheet Ready for Import“.
Click here to go to that support page.
Once you have your excel sheet downloaded and cleaned up, watch the video below or use the written tutorial below to see how to import your excel file.
How to import a ‘Positions’ export from your brokerage:
How to import a ‘Transactions’ export from your brokerage:
During your first login you will see the image below. To import a CSV transaction file, you will want to click the text inside of the red circle.
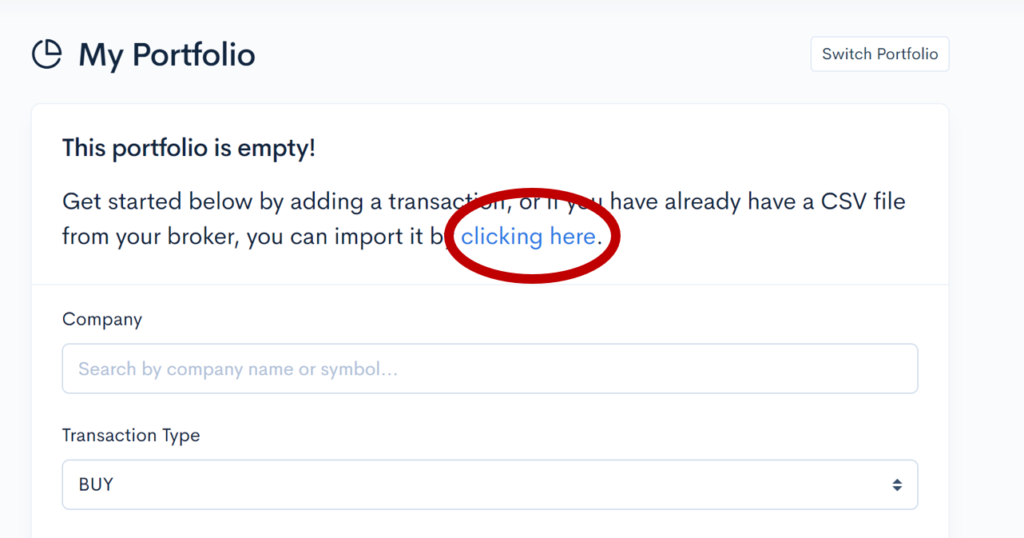
After clicking on the text, you will be prompted to upload a CSV file of your stock transactions.
NOTE: This file comes from your own personal online brokerage account: Divcaster does not connect to your brokerage account. Almost every broker offers you a method for exporting your transactions and portfolio. You should be able to find this when you log in to your online brokerage account or you can contact them for help.
To properly upload your transactions, you will need at least these four data columns in your CSV file:
- Stock Symbol
- Date of Purchase
- Purchase Quantity (how many shares did you buy)
- Price paid per share
You’ll have the option to import two more columns:
- Transaction Type (buy or sell)
- Transaction Cost
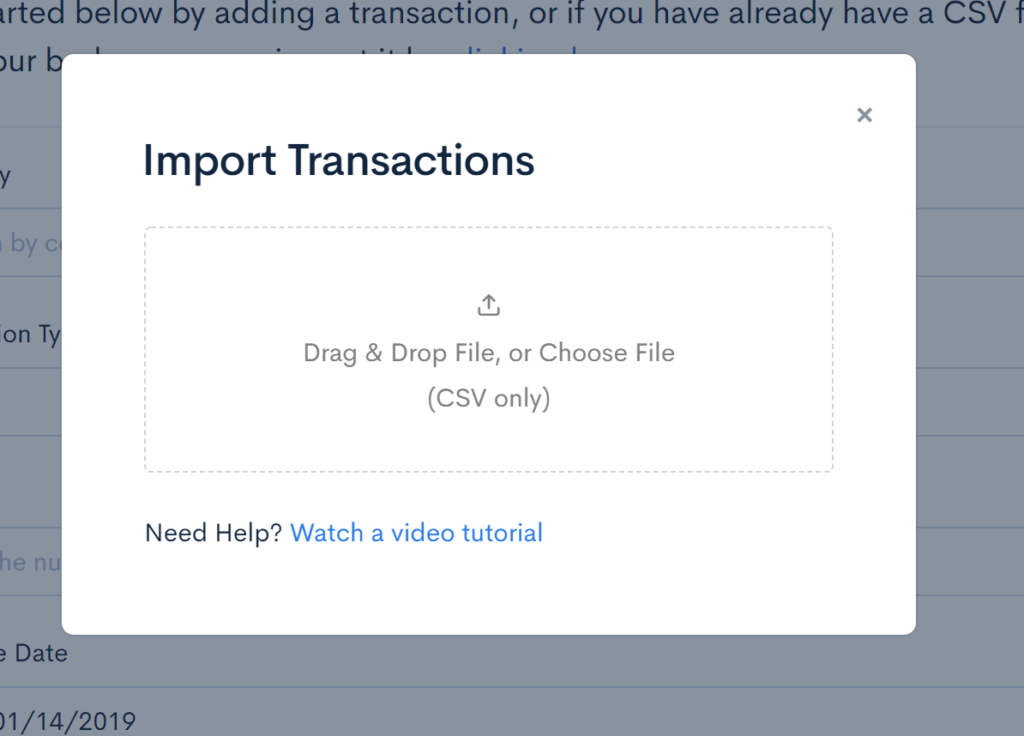
Now that you have your transaction CSV file, you can upload it to Divcaster! After clicking text in the red circle in the earlier image, you will be prompted with this screen:
Select your CSV file by either dragging and dropping the file icon into the box or click on the box and use your file selector.
Once you select your file, you will be taken to the following screen.
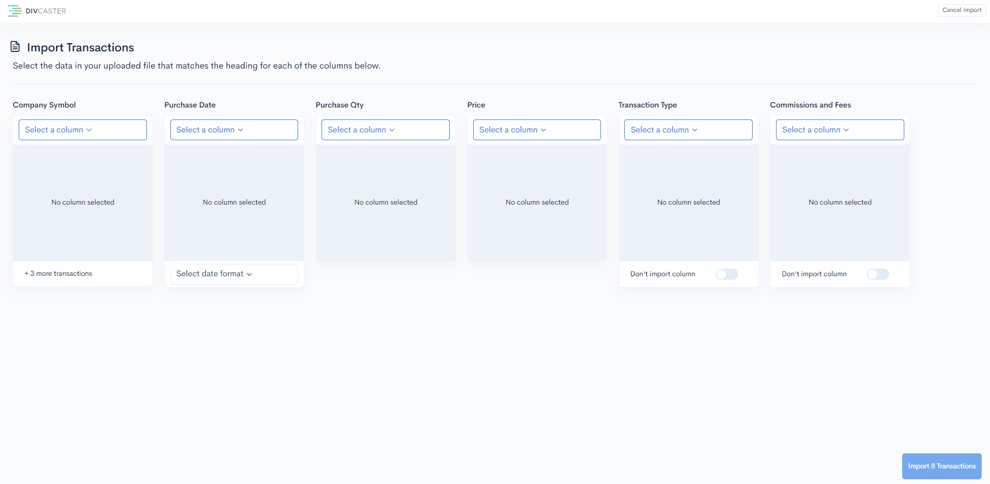
On this screen you will tell the transaction import tool which columns in your CSV file contain each different data point: Company Symbol, Purchase Date, Purchase Quantity, Price, and the optional columns Transaction Type and Commissions and Fees.
Online brokers can provide the data with different names, so you need to tell Divcaster which columns in your CSV file match up with the columns Divcaster needs.
To do this, you will use the dropdown item that says “Select a column”.
Clicking on the dropdown will bring up a list of all of the columns from your CSV file.
NOTE: Your brokerage might have exported some columns that are not needed by Divcaster, so in this step we will match the name of the column in the CSV to the data we desire to import.
Go through this list and match the name of the column with Company Symbol, Purchase Date, Purchase Quantity, and Price where appropriate.
Here is what your transaction import will look like once you select these four columns. These stock holdings are example only, yours will vary.
![]()
Be sure to select a date format for the “Purchase Date” column!
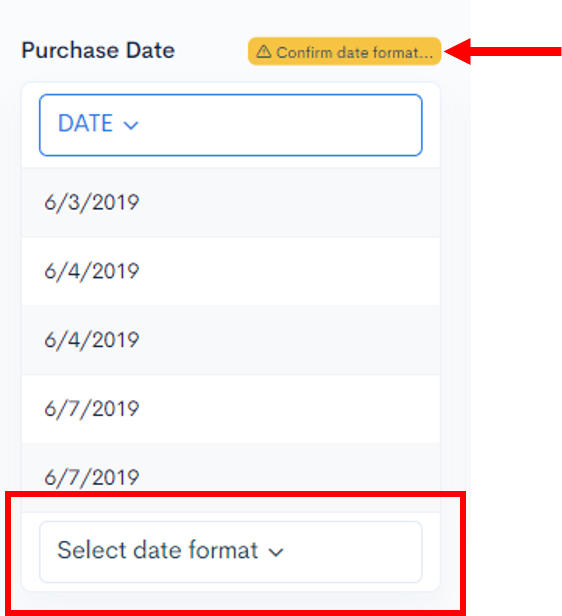
Selecting the date format tells Divcaster if your excel sheet formats date as Month/Day/Year or Day/Month/Year.
If the columns match and the data is correct, you will see the green check mark next to each column header.

You will not be asked to verify every transaction in your CSV file, only the first few lines to make sure there’s a match between the columns in your CSV file and Divcaster.
There are also two optional columns that you can import: Transaction Type and Transaction Cost. They are highlighted in the red box below.
![]()
These columns are NOT REQUIRED, but if you have these data points in your CSV, you will use the same process of matching the column names in the “Select a column” dropdown list.
If you do not have these data columns or do not wish to import them, select the “Don’t import column” option at the bottom.

Now that your columns have been matched and you have the green check-mark next to the column headers, go ahead and click the “Import Transactions” button at the bottom right-hand corner of the screen.
You’re all done! Once you click “Import Transaction” you will be taken to the main portfolio screen. Here you will find your income forecasting chart, what-if scenarios, and your portfolio income history.